| |


|
|
Transfer Molding
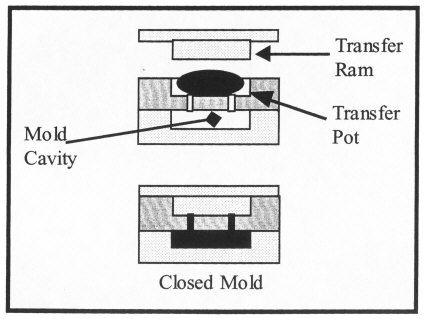
In a transfer mold procedure, the mold
is removed from the press and opened.
First, a metal insert is placed into the
cavity, and then a pre-cut piece of
uncured rubber of pre-determined weight
is placed into the transfer “pot.” The
loaded mold is then placed back into the
press and the press is then closed. The
pressure forcing the plates together
distributes or transfers the pre-cut
piece of uncured rubber in the “pot”
down through the “sprues” and into the
cavities. The uncured rubber is then
forced into the shape of the cavity in
the mold. An excess of material flows
out of the cavity along the gates and
vents. The mold remains closed until the
rubber is cured, completing the cycle.
Unlike compression molds, transfer molds
consume additional rubber when filling
the cavity in the “pot” and “sprues.”
Because the cavity plates start out
closed, however, less rubber escapes the
cavity thereby limiting excess flash.
This also makes it well-suited for
molding delicately shaped parts and
securing inserts that are embedded in a
product. Since you work with a single
piece of uncured rubber and not several
individual pre-cut or shaped pieces of
rubber for each cavity, the transfer
mold is ideal for colored and
translucent compounds. Transfer molds
have a shorter cycle and cure time than
compression molds. This is due to the
rapid transfer of heat to the rubber
while being forced from the “pot”
through the “sprue” and into the cavity.
It is also faster to load just one piece
of rubber when running a multi-cavity
mold. Due to the more complex design of
a transfer mold, it is more expensive to
purchase than a compression mold, but it
may be better suited for your product
design.

CUSTOMER TESTIMONIALS
|
|